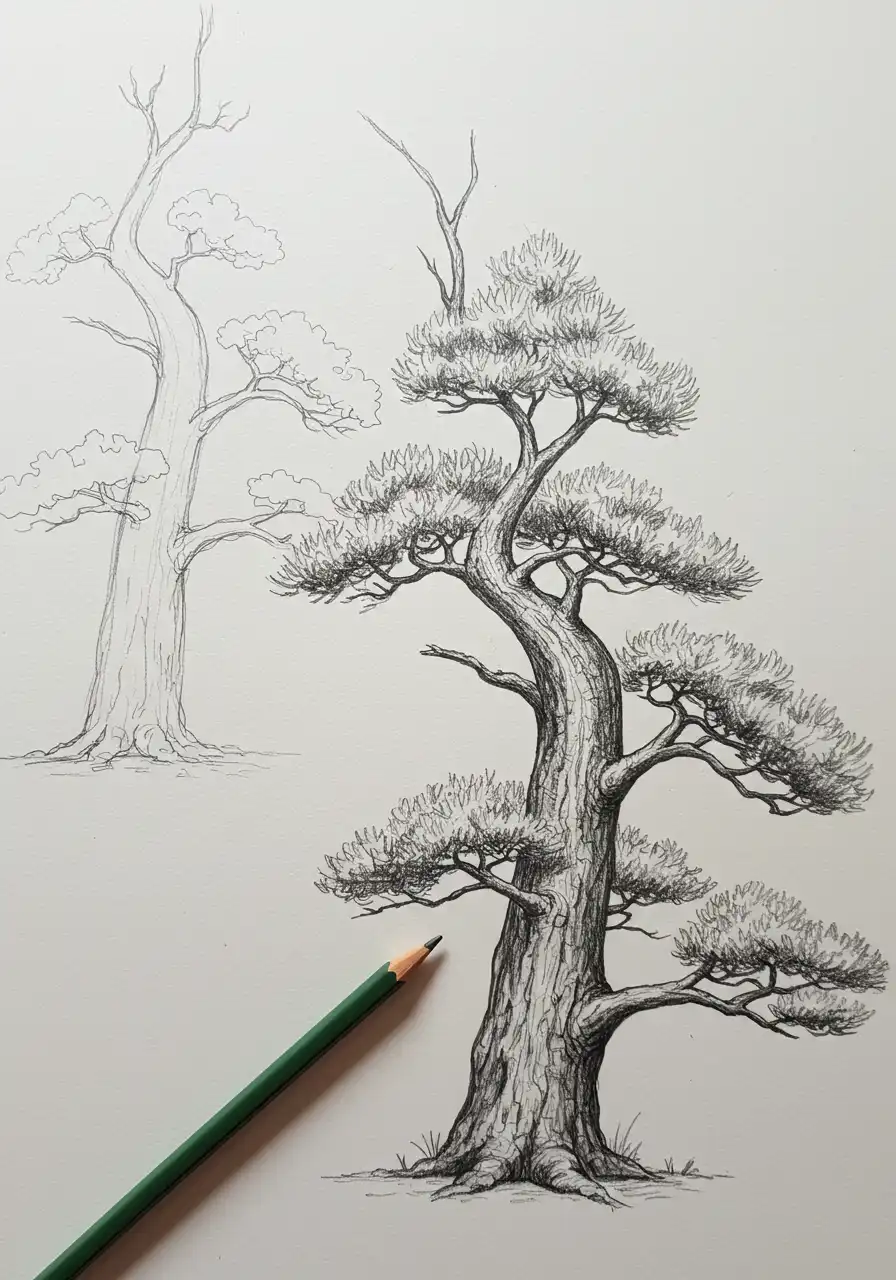
Drawing a tree with pencil is a rewarding exercise for artists of all levels. The image above beautifully demonstrates a detailed pencil drawing of a tree, showcasing texture, form, and natural elegance. Here’s how you can draw a similar tree:
Step 1: Outline the Tree Structure
Start by sketching a basic outline of the tree trunk and main branches using light pencil strokes. Don’t worry about details yet — focus on the overall shape and natural flow of the tree. You can draw a slightly curved trunk to give the tree character, as seen in the main tree on the right.
Step 2: Add Branches and Canopy Shapes
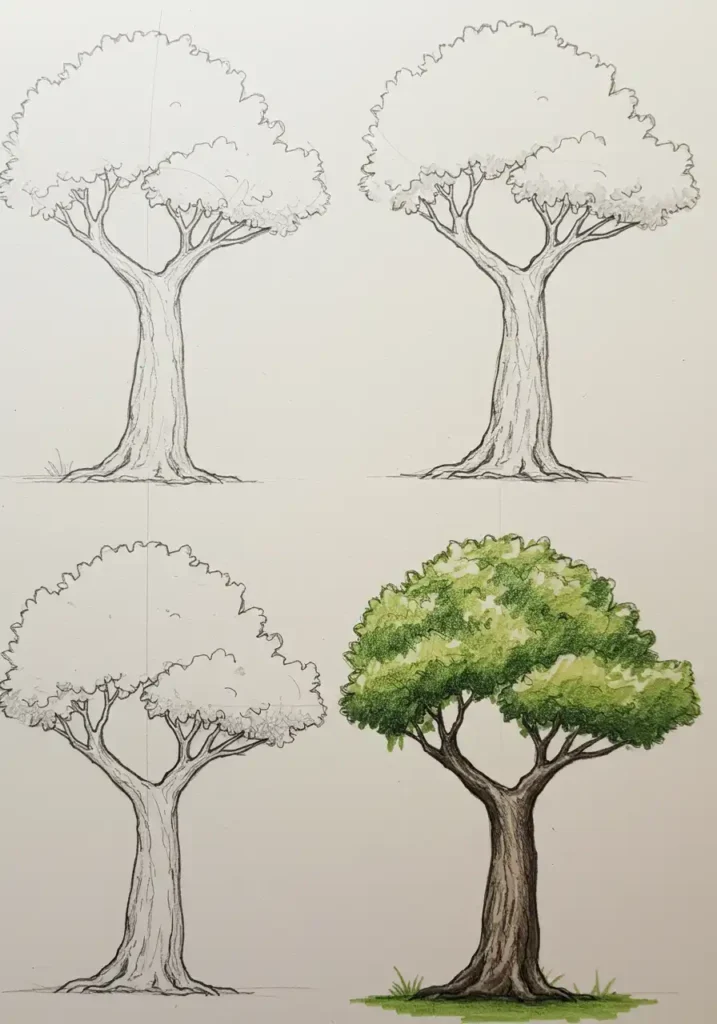
Lightly sketch out the general areas where the foliage will go, using cloud-like shapes for guidance. These outlines will help define the volume and placement of the tree’s leafy clusters. Be sure to vary the branch directions and lengths for a more organic look.
Step 3: Define the Trunk and Large Branches
Once you’re satisfied with the basic shape, go over the trunk and major branches with more confident, darker lines. Add texture by drawing lines that follow the flow of the bark, including knots, cracks, and irregularities. Use a slightly softer pencil (e.g., 2B or 4B) to add depth and variation in tone.
Step 4: Detail the Foliage
Using short, fine pencil strokes, begin filling in the leafy areas. For a pine-like effect (as seen in the image), use spiky or tufted strokes to suggest clusters of needles or leaves. Shade more densely where the foliage is thick or where shadows fall.
Step 5: Add Shading and Texture
Use cross-hatching or circular shading techniques to add depth to both the trunk and the foliage. Focus on where the light source is coming from, adding shadows on the opposite side. For example, shade the right side of the trunk more if the light is coming from the left.
Step 6: Refine Details
Clean up any stray lines with an eraser, and reinforce your darkest shadows to increase contrast. You can add grass or roots at the base of the tree to ground it more realistically.
Step 7: Final Touches
Blend slightly with a blending stump or tissue for smooth transitions, but keep the texture visible to preserve the natural look. This stage is where the drawing really comes to life.
Tips:
- Use reference images of real trees to understand structure and form.
- Vary your pencil pressure to create a range of tones.
- Be patient — the intricate details can take time but are worth the effort.
With practice and observation, drawing realistic trees with pencil becomes both easier and more enjoyable. Happy sketching!